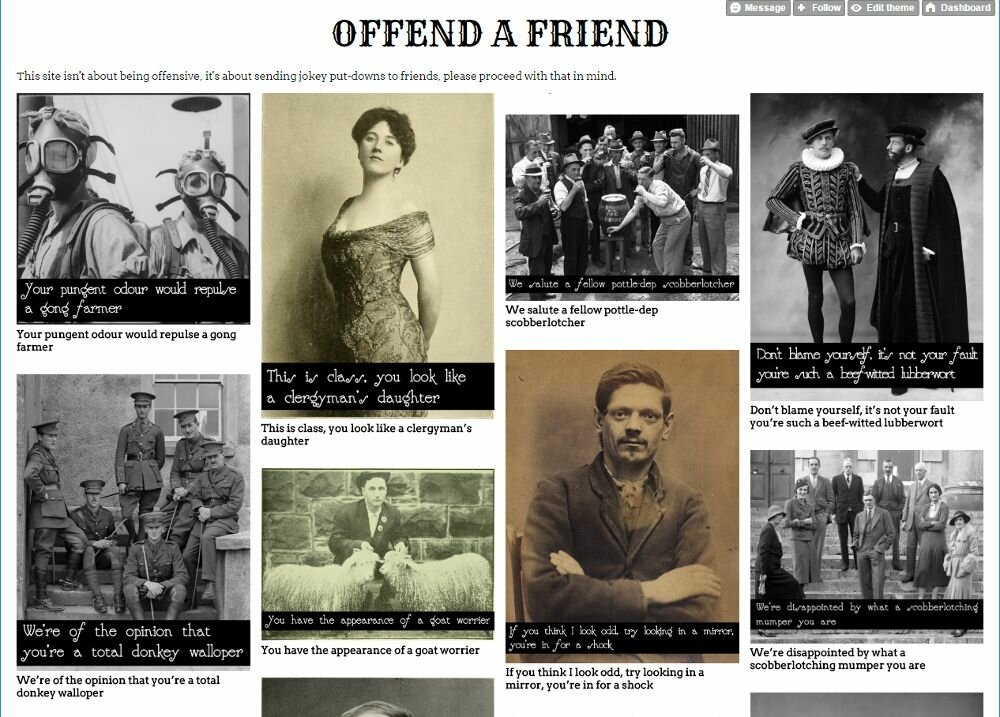
Last year some time I whipped up a simple site based on a premise I’d had knocking around in my head for a while. The aim is simple: .
I originally registered a domain and hosted it on GitHub pages but as the domain expired, despite the relatively low cost, I was reluctant to waste money on a vanity project. I could have left it hosted with a Github domain, but I had been looking for an excuse to try another platform.
I knew you could bend Tumblr to host more than just the traditional tumblog format with chronological posts and this gave me the opportunity to try it.
Storing your content
The site is fairly simple, largely consisting of a bunch of images. In fact it’s closer to a single page app (SPA) than a proper website. The first task, therefore, was to figure out how to store those images so they were accessible.
As it turns out, you can store static content in relation to a theme on Tumblr, but there’s no easy way to retrieve these. On the original site I used a JSON file to store image names, etc. I would then simply use the paths in the file to retrieve the relevant images.
I could have swapped out the relative paths to an image folder for full URLs of the images I’d loaded against the theme, but a simpler alternative presented itself: load the images as image posts.
Images are one of the post types on Tumblr and they happily let you load your images to their servers. The benefit of storing them as posts meant I could easily associate a description with it and it also made it very easy to retrieve, as Tumblr is built to work that way.
Creating a theme
Themes are what control the look of the site on Tumblr. They can be as complex or as simple as you like, either one template or different ones for different page types. You can store all your content inside the theme — but you can only edit it via the Tumblr UI this way — or you can upload static files (such as CSS and JS) and reference them.
I went the latter route, although I found that when trying to adapt and troubleshoot my JavaScript it was easier to inline the code into the body of the theme as it allowed for quicker iterations (as you spend a lot of time manually overwriting files and sometimes updating the reference). Once done I moved the JS and CSS to their own files.
You do have the option to replace a static file once you have loaded it, so you can maintain the reference, but I found that Tumblr’s interface would ‘forget’ some of the static files, especially if you had to leave the theme and come back in. It would appear nothing was linked so the option to replace it was lost. That made it hard to make changes.
Details of how to create a custom theme can be found in , which aren’t the easiest to locate. They also include details of Tumblr’s templating language.
The latter should be reasonably familiar to anyone who’s encountered any of the plethora of them, every programming and scripting language seems to have some that are pretty much identical. Essentially it’s keywords wrapped in curly brackets, e.g. {Title}.
If you’re going to be creating a truly custom layout, as mine was, then starting from an empty file, or working on a version separately and switching out static placeholders for the dynamic tags is fine. If you’re going for a more traditional Tumblr look then you may want to seek out one of the Tumblr boilerplates that are around. Or you can take the default theme and begin stripping back (as I have also done).
Developing your theme
You can of course work on your theme in a more traditional development environment, which is certainly the fastest way, before loading to Tumblr after inserting the appropriate code for the dynamic data.
The only way to truly see what it’s going to look like, however, is to update the HTML of your Tumblr and see how it displays.
Obviously you can do this on your live site, and if it’s not yet launched, or you don’t care about disrupting your visitors, then there’s no issue. You can even password protect your site while you work on it.
If you don’t want people to see your work in progress, then it’s easy enough to create an additional blog on your account that you can use for development purposes. That’s the route I went.
To do that:
- Login and go to
- Click the little silhouette of a person in the menu
- Click New next to the Tumblrs heading on the dropdown menu
- Once you’ve created it, select it from the same dropdown and click ‘Edit appearance’
- On the page you’re taken to, you will see the option to ‘Edit theme’
- Finally, you’ll see the option to ‘Edit HTML’ under ‘Custom theme’ at the top of the sidebar
To see how your new layout looks, paste your code into the box and click Update preview. If you’re happy with it, hit Save to keep it.
Adding pages
Although most Tumblr blogs are simply a list of chronological posts, you can do things like adding pages to make it look and work more like a traditional website. You can do this on the page where you edit your theme HTML.
For pages you have the option to use the same layout as the rest of your site or some new custom HTML, along with a URL of your choice, which means you can really mix it up.
Unleashing it
Once you’re happy with the look you’ve created, it’s simply a case of saving the code to your live Tumblr by editing the HTML as mentioned above. As soon as you hit save your site will update and your new look will be available for all to see.
Thoughts
Kudos to Tumblr for providing a free place to host your content, even giving you a free subdomain. Using an existing theme makes the whole process pretty simple. It’s not the easiest thing to customise though, partly because finding the option is harder than it should be but also because developing new themes involves a a lot of back and forth, copying and pasting into their UI. They could do with streamlining this process, or offering some sort of offline viewer to help encourage developers.
Other than that it’s reasonable way to get your content online.